INSTALL A CEILING FAN in Your Home!
Argo Electrical Services
A New Ceiling fan in most rooms can add indoor or outdoor comfort, create better air flow, and improve looks. Unfortunately, most people are unsure of correct installation practices for contemporary ceiling fans, and this can lead to electrical safety issues. Improperly installing a ceiling fan can lead to fire safety issues with your electrical system, but it can also cause damage to your ceilings and walls. Additionally, a ceiling fan that is not secured can even break loose and cause property damage or even damage to you or your loved ones. If you're interested in installing a ceiling fan, but you're not sure how, here are some steps to take. The job can be easy (note: the instruction described below assumes that you are installing a electric fan in a spot where an existing ceiling light fixture was previously installed):
- TURN THE POWER Source OFF AND REMOVE THE Electrical FIXTURE

- REMOVE The Existing Light
Next, remove the old light to reveal the electrical box. This box contains the insulated wires that power your ceiling fan. If a plastic box is present, you will probably want to replace it with a metal box that is specifically rated for ceiling fan usage. If the support isn't sufficient, the fan will compromise the integrity of your ceiling. We like to install double Treated 2x4's for support. Many Electricians in Cumming GA install a braided safety cable depending upon the size of your fan.
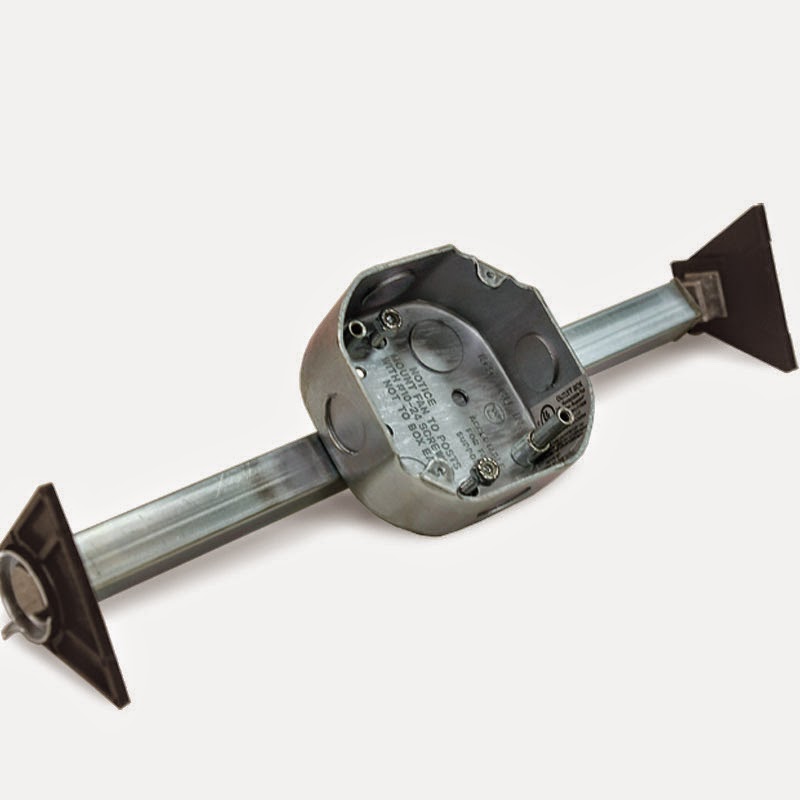
- INSTALL ELECTRICAL BOX AND/OR MOUNTING BRACKET
Once the old fixture is gone and you have decided whether you will need to upgrade your box and/or support, you will need to install them in a NEC code compliant and workman like fashion. In most cases, this can be done quickly with a simple driver. Keep in mind that you’ll need to ensure that your replacement box is secured to a ceiling joist. Always use 3" wood screws. This is where the braided cable comes into play.

- INSTALL The Electric CEILING FAN
Construct your fan with the blades attached and lead its wires through the top. Down RODS can be 6",12", or even 4', or 6' Long. Connect the wires from the fan to the wires from your electrical box. Attach White or Grey neutral wires to the neutral wires and green wires to all other ground wires. Some of these may be bare copper. Your positive wire will be Black, Red, or Blue. Attach to the positive wire. They should be marked from the manufacturer. but you may also have wiring for any light fixtures attached to your fan. Read and follow all instructions that come with your ceiling fan, especially when dealing with electrical wiring.

- TURN POWER ON AND ENJOY
After you’ve connected the electrical wiring, mount your fan to the box and/or bracket, turn on the power, and enjoy your new ceiling fan. You can manipulate the speed of the fan with a Timer. Also, most Home Improvement Sales Floors will offer decorative ends for your pull chains.